
Capturing high-quality images of animals in their natural habitats is key. It requires knowing the best camera settings. With the right settings, photographers can freeze the perfect moment, revealing the intricate details of their subjects.
Recent studies show mastering camera settings is vital for animal photography fans. By adjusting settings like shutter speed, aperture, and ISO, photographers can tackle the challenges of capturing images in the wild.
Key Takeaways
- Understand the importance of camera settings in wildlife photography
- Learn how to adjust settings for optimal image quality
- Discover the best practices for capturing stunning animal images
- Master the art of freezing the perfect moment in wildlife photography
- Improve your photography skills with the right camera settings
Understanding Animal Photography Fundamentals
Animal photography is exciting but also very challenging. It needs a good mix of technical skills and knowing how animals behave. Photographers must be good with their gear (with quality cameras like the ones you can find at sites like camtura.com) as well as be ready for the animals’ unpredictable moves.
The Unique Challenges of Photographing Animals
One big challenge is how animals can act suddenly. They might move fast, change direction, or just stop. This means photographers must stay alert and quick to adjust.
Understanding animal behavior is key. It helps photographers guess what animals might do next. This way, they can set up their shots better.
Balancing Technical Settings with Artistic Vision
Good animal photography needs both technical skills and creativity. Settings like shutter speed, aperture, and ISO must match the scene and animal. At the same time, keeping an artistic vision ensures the photos look good and are well-made.
By getting good at both tech and art, photographers can take amazing animal photos. These photos show the beauty and true nature of their subjects.
Choosing the Right Camera Mode
To take amazing photos of animals, picking the right camera mode is key. The mode you choose affects the photo’s depth, how moving subjects are caught, and the image’s quality.
When to Use Aperture Priority
Aperture priority is great for animal photos, especially for controlling depth. A wide aperture (low f-stop number) makes your subject pop by blurring the background. It’s perfect for wildlife photography where your subject must be clear.
When to Use Shutter Priority
Shutter priority is best for capturing animals in motion. Fast shutter speeds freeze the action, giving sharp photos. Slow shutter speeds create a blur, showing the scene’s movement.
Benefits of Manual Mode for Controlled Environments
In places like pet studios, manual mode gives you the most control. You can adjust exposure settings to get the perfect shot. It works best when the lighting is steady, letting you tweak settings for the best results.

Mastering Shutter Speed for Animal Photography
Shutter speed is key in animal photography. It helps freeze or blur motion. The right speed captures an animal’s true behavior.
Freezing Action with Fast Shutter Speeds
Fast shutter speeds are needed for sharp animal photos. Aim for at least 1/1000th of a second. This is best for fast subjects like birds or cheetahs.
“A fast shutter speed is crucial for capturing the intricate details of an animal’s movement, allowing photographers to convey the power and agility of their subjects.”
Creating Motion Blur for Artistic Effect
Slow shutter speeds can also be great. They create motion blur, adding movement and energy to your photos.
Recommended Shutter Speeds for Different Animal Behaviors
Shutter speeds vary with animal behavior. For example:
- 1/1000th of a second or faster for birds in flight
- 1/500th of a second for running mammals
- 1/125th of a second for slower-moving animals like turtles
Knowing these speeds helps photographers capture the right moment.
Aperture Settings for Perfect Depth of Field
The aperture setting is key in photography. It affects the depth of field, which is vital for animal photos. Aperture controls how much light gets into the camera. Choosing the right aperture can make your photos better by focusing on your subject or background.
Using Wide Apertures for Subject Isolation
Wide apertures (small f-stop numbers) are great for making subjects pop. They create a shallow depth of field. This is perfect for wildlife photos where the animal needs to be the main focus. As Ansel Adams said, “You don’t take a photograph, you make it.” Using a wide aperture adds creativity to your animal photos.
When to Choose Narrower Apertures
Narrower apertures (larger f-stop numbers) are good for more depth of field. This keeps more of the image sharp. It’s useful for photos where you want the animal and its surroundings to be clear.
Balancing Aperture with Available Light
Wide apertures let in more light, which can be a challenge. In bright light, use shorter exposure times or filters. In dim light, adjust your aperture or ISO to get the right shot. Light changes mean you need to adjust your aperture settings too.
ISO Settings for Various Lighting Conditions
ISO settings are key in animal photography. They help adjust to different lighting. Getting the ISO right is essential for top-quality photos.
Low-Light Animal Photography Techniques
In low light, you might need to raise the ISO to let more light in. But high ISOs can add noise to photos. To avoid this, try using a wide-aperture lens or stabilizing your camera.
| Lighting Condition | Recommended ISO | Additional Tips |
|---|---|---|
| Bright Sunlight | 100-400 | Use the lowest ISO for the best image quality. |
| Overcast or Shade | 400-800 | Adjust ISO based on the available light. |
| Low Light | 1600-6400 | Use a tripod or stabilization to minimize camera shake. |
Managing Noise in High ISO Situations
When shooting at high ISOs, controlling noise is key. Use your camera’s noise reduction tools, shoot in RAW, and reduce noise in editing. Knowing your camera’s ISO performance helps make better choices.
Focus Techniques That Capture Sharp Animal Images
To freeze the moment, photographers must use effective focus techniques. They need the right equipment and a deep understanding of how to use it. The right techniques can turn a blurry image into a sharp, captivating photo.
Selecting the Optimal Focus Mode
Choosing between AF-C (Continuous Autofocus) and AF-S (Single Autofocus) is key. AF-C works best for moving subjects, like animals, as it keeps adjusting focus. AF-S is better for still subjects or when you want to lock focus on a point.

Focus Point Selection Strategies
Understanding your subject’s behavior is key to focus point selection. For fast animals, using many focus points helps capture sharp images. Choose the focus point that matches the animal’s most active feature, like the eyes.
Back-Button Focus for Wildlife Photography
Back-button focus lets you control autofocus and shutter release separately. This is great for wildlife photography, where subjects move unpredictably.
Pre-focusing Techniques for Fast-Moving Animals
Pre-focusing sets focus to a distance where the animal will be. It’s useful for fast animals by anticipating their path and preparing the camera.
Mastering these focus techniques can greatly improve your animal photography. You’ll get sharp, high-quality images even in tough situations.
White Balance Considerations for Natural-Looking Images
Getting the right colors in animal photos is key. White balance helps show the true colors of your subject. It makes sure colors look right, no matter the lighting.
Auto White Balance vs. Manual Settings
Auto white balance is easy to start with. But it might not get the colors right, especially in mixed light. Manual white balance settings let you adjust for the scene. This makes your photos look more natural.
For example, golden hour and midday sun need different settings. This ensures your photos capture the scene’s true colors.
Adjusting White Balance for Different Environments
Every place needs its own white balance. Shaded areas need cooler light, while sunny spots need warmer. Here’s a quick guide:
| Environment | White Balance Setting |
|---|---|
| Sunny | 5500K – 6500K |
| Shade | 7500K – 8500K |
| Indoor Lighting | 2800K – 3000K |
Knowing how to adjust white balance makes your animal photos better. It’s all about matching the lighting to get the best colors.
Drive Mode and Burst Settings for Action Shots
In the fast world of animal photography, drive mode and burst settings are key. They let photographers take many frames per second. This boosts the chance of getting the perfect shot.
Continuous Shooting Strategies
Continuous shooting means taking many shots fast while holding the shutter button. It’s great for catching animals in motion. To get the most from it, remember:
- Use a fast memory card for quick data transfer.
- Clear the camera’s buffer by transferring images often.
- Be ready to snap when you see the action.
Buffer Management for Extended Shooting
Managing the buffer is vital for long shooting sessions. The camera stores images in the buffer before writing them to the card. To not fill the buffer:
“Use high-speed memory cards and adjust camera settings for better data transfer during long shoots.”
To manage the buffer, do this:
- Choose high-speed memory cards.
- Lower image quality or resolution when you can.
- Pause between shots to let the camera clear its buffer.

Mastering drive mode and burst settings helps photographers get better animal action shots. Using these features well, along with continuous shooting and buffer management, leads to great animal photos.
Specialized Settings for Different Types of Animal Photography
To get great animal photos, you need to know the right camera settings. Each type of photography, like wildlife, pet, and zoo, has its own needs. You must adjust your camera settings to get the best photos.
Wildlife Photography in Natural Habitats
Wildlife photography is all about knowing your subject and its home. You’ll need a long lens and fast shutter speed to take photos without scaring the animals.
For wildlife photos, use a high ISO, wide aperture, and continuous autofocus. This helps you capture animals moving freely in their natural setting.
| Setting | Wildlife Photography |
|---|---|
| ISO | High (1600-6400) |
| Aperture | Wide (f/2.8 – f/4) |
| Shutter Speed | Fast (1/1000th sec or faster) |
Pet Photography in Controlled Settings
Pet photography is done in places you can control. This means you can play with camera settings more. Use a lower ISO and wide aperture to make the pet stand out.
For pet photos, a slower shutter speed can add movement. But, fast speeds work best for lively pets.
Zoo and Aquarium Photography Challenges
Zoo and aquarium photos come with special challenges. Like dealing with glass and artificial light. A polarizing filter can cut down on glass glare. Adjusting white balance helps with odd lighting.
Fast shutter speeds are key to stopping animal movement behind glass or in busy places.
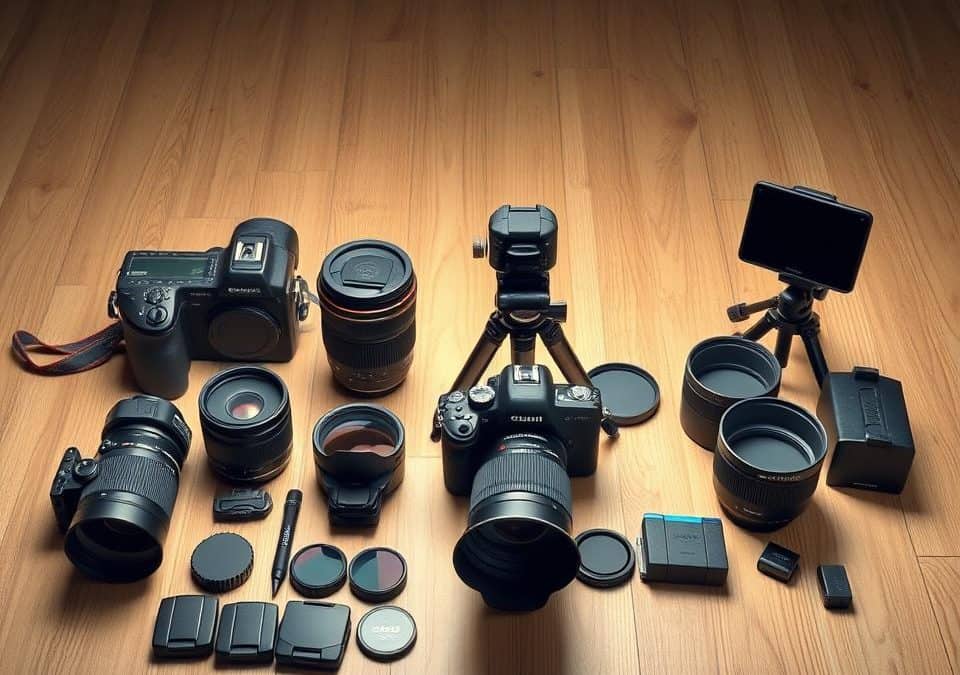
Essential Camera Equipment for Animal Photography
For animal photography, the right camera gear is key. It helps you get professional photos. The right tools let you see the details and actions of animals.
Lens Selection for Different Animal Subjects
Choosing the right lens is crucial. A telephoto lens (at least 200mm) is best for wildlife shots. It lets you take photos from far away without scaring them.
For close-up shots of small animals, use a macro or prime lens. These lenses give you the detail and sharpness you need.
Tripods, Monopods, and Stabilization Tools
Stability is important for sharp photos, especially with long lenses. Tripods and monopods help keep your camera steady. They also reduce camera shake and fatigue.
Lens or camera stabilization tools can also improve your photos. They help make your images sharper.
| Equipment | Purpose | Benefit |
|---|---|---|
| Telephoto Lens | Capturing distant subjects | Reduces disturbance to wildlife |
| Tripod/Monopod | Stabilizing the camera | Reduces camera shake and fatigue |
| Lens/Camera Stabilization | Enhancing image sharpness | Improves image quality |
Useful Accessories for Field Work
Other useful items include camera bags and lens cleaning kits. They help you carry and keep your gear in good shape. Wearing camouflage clothing also helps you blend in with your surroundings.
Advanced Techniques to Elevate Your Animal Photography
To improve your animal photography, learning advanced techniques is key. Creative composition, lighting, and editing can greatly enhance your photos. These skills help you take stunning wildlife pictures.
Try using leading lines or framing with nature in your shots. Lighting is also vital. Knowing how to use natural light and add extra light can make your photos better. Editing software can also help, letting you tweak exposure, contrast, and colors.
Using these advanced techniques can make your photos stand out. They show the beauty and variety of wildlife. Whether in a studio or outdoors, these methods will make your photos amazing.